


How to Clean Your Mechanical Keyboard!
Let’s face it, your awesome mechanical keyboard may need a good cleaning. Even your favorite mechanical keyboard needs a clean every now and then to keep it looking as good as day one. Here's how to clean your keyboard.
Luckily, it’s actually quite easy to do, and usually doesn’t require any special tools. Most of the things that are used to clean your mechanical keyboard can be found around your house, and some are even included in the product box!
How to Clean Your Mechanical Keyboard
What You Will Need to Clean Your Mechanical Keyboard
- One Toothbrush (Not your family member’s toothbrush! Use a new one)
- A clean, dry cloth
- Your dirty keyboard, of course!
- Q-Tips (For hard to reach areas)
- Can of Compressed Air (Not necessary)
- Mild soapy warm water
- Keycap Puller
A can of compressed air can be useful as it can save you some time, but it’s not necessary as you can use the Q-Tips and cloth to clean the hard to reach places between keys.
1) Unplug your keyboard and take a picture!
This important step is absolutely necessary, as you’ll definitely NOT want to leave your keyboard plugged in while having its keycaps near water in any way.
Taking a picture of the keyboard may seem odd, but actually it will help you to assemble the keyboard after cleaning it! It’s easy to forget the layout when there isn’t any keycaps on the board!
2) Turn your keyboard upside down and *shake shake shake* it!
This simple first step is absolutely necessary, and I’ll admit, kind of fun to do. Just simply flip the keyboard upside down and shake it, and tap on the back of it to dislodge any dirt, dust, potato chips, crumbs, cat hair, dog hair and more. This is just the first step, so don’t get excited yet as your keyboard still needs more cleaning.
And it goes without saying, but don’t do this over any soft surfaces as you’ll end up needing to clean those too.
3) Use a keycap puller, and remove all of the keycaps.
In your Fantech mechanical keyboards, you’ll see a keycap puller included in the package if the product includes one. You can use this to easily pull off each keycap from your keyboard. Do this gently, one-by-one until the process is complete. If your keycaps are excessively oily, then wipe them down with some tissue to prepare them for what comes later.
If you don’t have a keycap puller, you can use a toothbrush and Q-tips, to clean in between the keycaps but this isn’t as effective as some dirt may still be stuck under them.
4) Turn the keyboard upside down again and *shake shake shake*!
After removing the keycaps or dislodging dirt with a toothbrush/Q-tip, turn your keyboard upside down again and shake it. This will help any of the previously trapped dirt to fall out of the keyboard.
Again, don’t do it over a soft surface so as to avoid cleaning up more mess.
5) Now, take those keycaps and give them a bath!
We don’t suggest actually taking a bath WITH the keycaps, of course. Simply take them and put them into your bowl of warm soapy water. Swish them around in the warm water, and let them soak for 10 minutes, or more, until they’re clean.
After soaking, rinse them with fresh water to remove any leftover grime or dirt.
6) Dry your keycaps!
Now, we all know that water shouldn’t come in contact with electronics. Take your damp keycaps and wipe them with a fresh cloth until most of the water is removed. Next, let them air-dry in a fresh towel for a few hours until they’re absolutely dry.
If you just pat them dry with a towel, then this could leave excess moisture on the keycaps which could damage the keyboard. Don’t do that.
7) Optional: Take the compressed air and get ready to blast!
Take your can of compressed air, and aim it towards the keyboard, and pull the trigger! Blast away all that stubborn dust and grime. This is actually the most fun part of the process.
8) Take a towel and Q-tips and clean the keyboard.
Now, for this crucial step, take a clean towel or tissue, and a few Q-tips. Use these to clean the keyboard while the keycaps are drying. This will ensure all of the tough to reach spots will be thoroughly cleaned, and that your keyboard will look as good as day one!
8) Make sure everything is dry, and assemble!
After making sure that everything is dry (the keycaps, the keyboard, etc), take the keycaps and connect them back to the keyboard. If you’re stuck, just simply look at the photo that you took before to see the exact layout of your keyboard.
Now you’re done!
Looking for a great new keyboard or need some help?
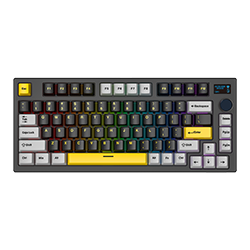
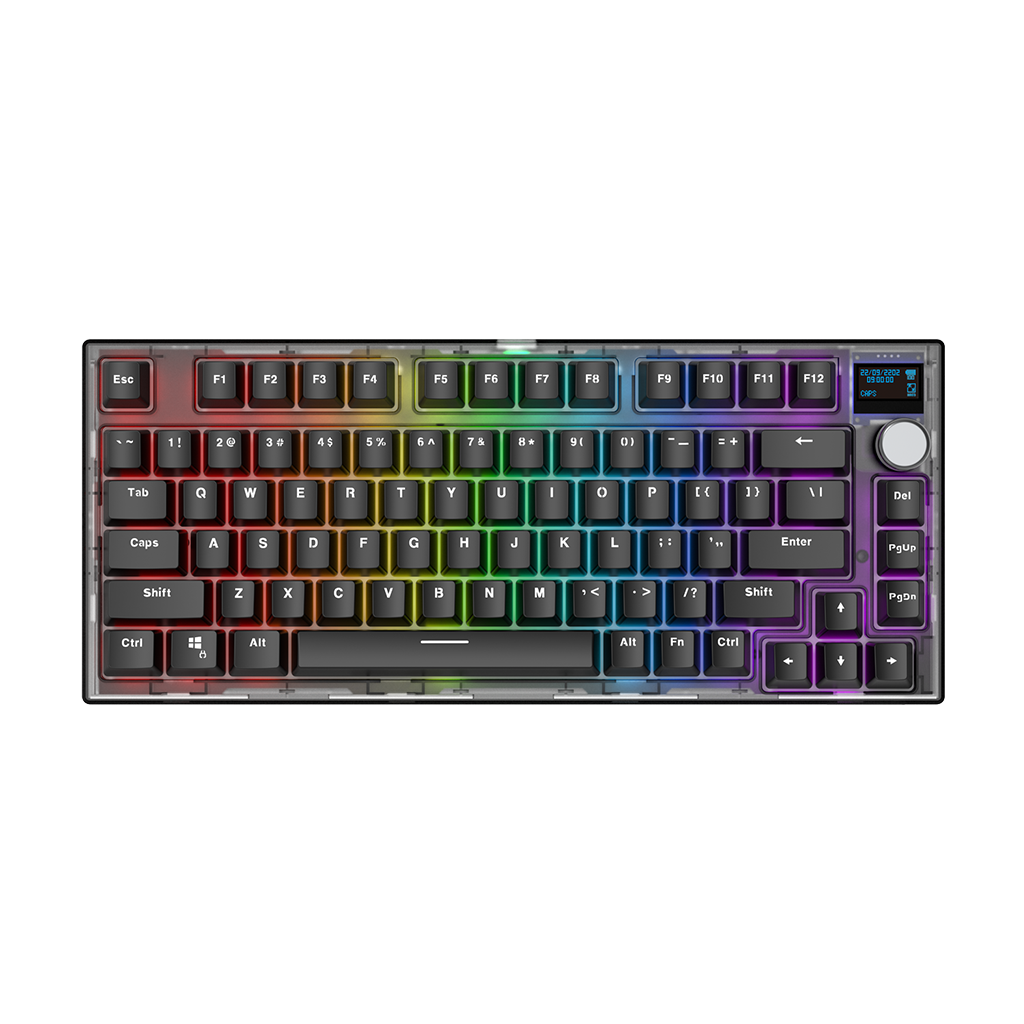
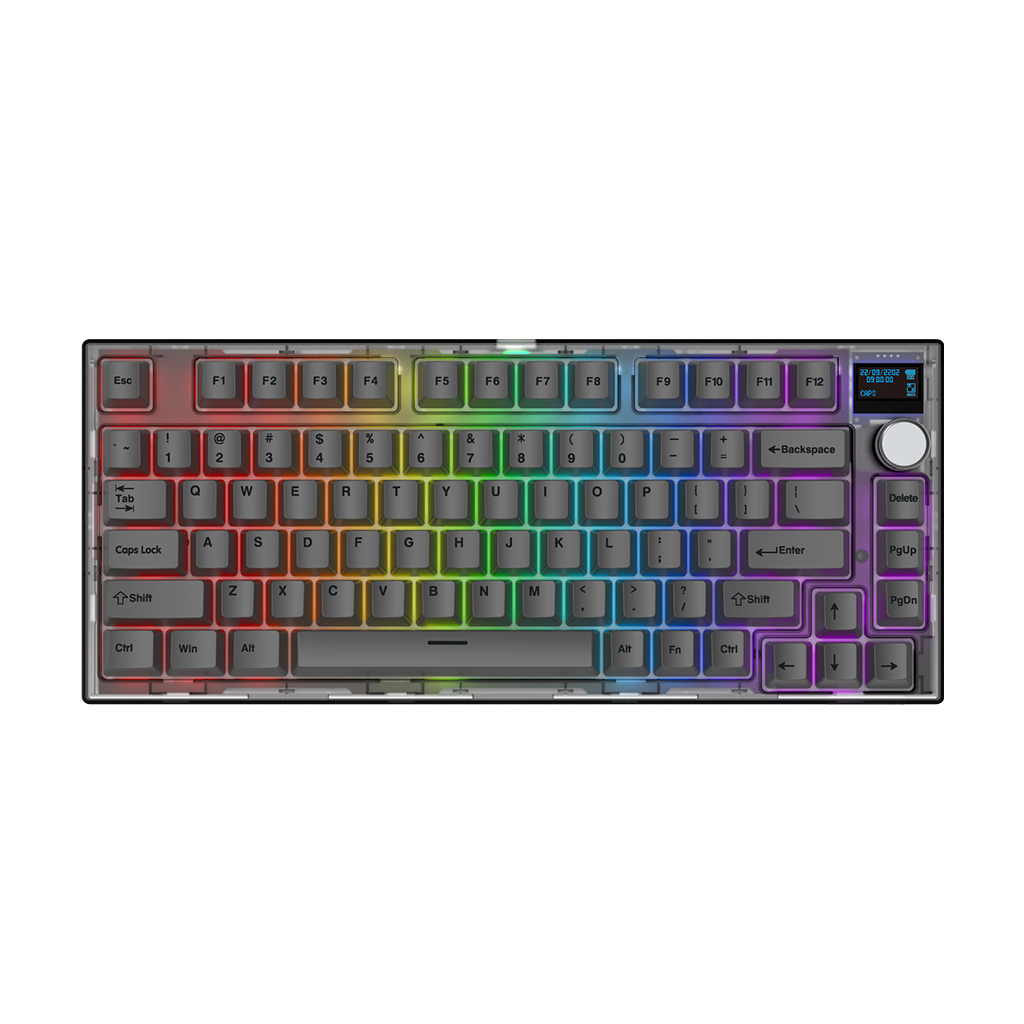
If you’re looking to buy a new keyboard, feel free to check out our MAXFIT67 below! Our MAXFIT67 features hotswap sockets, premium PBT keycaps, premium switches and more. Best of all, it won the TechPowerUp Highly Recommended award!
If you need some extra help when cleaning your keyboard, feel free to reach out to us at our support portal!
MAXFIT67
RGB MECHANICAL HOTSWAP KEYBOARD
- Highly Recommended by TechPowerUp!
- 65% Form Factor
- South Facing PCB
- Rotary Encoder Knob
- Wireless (BT + 2.4ghz) & Wired
- Gateron Hotswap Sockets
- Kailh Box White / Pre-Lubed Gateron Milky Yellow Switches
- DYE-SUB PBT Keycaps
- Includes plate foam & tray foam


